Looks like wood – but it isn’t. The antique safe is made nearly 150 years ago in 1870 and it is made of massive steel. The deceptively realistic looking wood grain was painted by an artist in painstaking work. The safe, made of solid steel, weighs 300 kilos. The double walls with a thickness of approx. 20 centimeters are filled with a loose bed of sand and aluminum powder.
Because of the powder, the vault was extremely safe and very hard to open with regular tools. Today you could use an angle grinder to open the safe without a key. The safe corresponds to the safety level B. That means: it offers a limited protection against burglaries and can be used as a weapon cupboard.
Gluing instead of screwing
Now it should get the final touch and be decorated with brass ornaments. Normally these are screwed from the inside to the door. The door is supported by special hinges and is protected by a bolt mechanism. In order not to disassemble the complicated mechanics, we bonded the ornaments with our construction adhesive RK-1300. This way, we embellished the vault in just a few steps!
The preparation
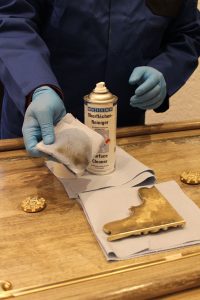
First, the ornaments were applied and traced with a pencil. Then, the surface to be bonded was carefully abraded to remove the paint. The brass parts and the vault surface were cleaned with our Surface Cleaner and a clean, fuzz-free paper towel. (See also our report on surface treatment)
Adhesive and primer
Our adhesive RK-1300 reacts with a special primer. If you only apply the adhesive, no chemical reaction would take place. The whole thing would simply not bond.
Therefore, I first applied our primer to the vault surface and in the next step the adhesive to the back of the brass ornaments. When fixing the ornaments on the vault, both components react with each other and the adhesive cures.
Excess glue was immediately removed with a small spatula. After 24 hours, the adhesive had reached its final strength and the vault could be set up.
Bonding was the better solution in this case again!
Written by guest author Mona Schele


