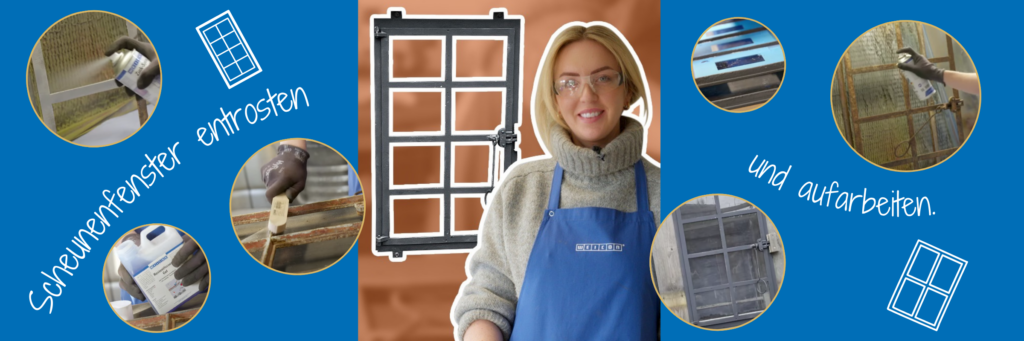
Old barn windows have a unique charm – they add rustic character to any building and are perfect for creative DIY projects. But what if time has taken its toll and rust has crept across the metal parts? Restoring a rusty barn window might sound tricky, but it’s easier than you think! We show you how you how to removing rust with the right equipment and a bit of patience and how you can easily refresh its look. For example, our restored window now enjoys a second life in the chicken coop. It not only provides fresh air and lets in plenty of daylight but looks fantastic!
Step 1: cleaning the barn window and removing rust
Before removing the rust, the barn window needs a thorough clean. A wire brush works wonders and removes coarse dirt quickly. Don’t forget your safety goggles and gloves! Brushing can send a lot of dust and rust particles into the air. With firm, circular motions, the rust starts to come off almost by itself. For hard-to-reach corners, a screwdriver works brilliantly. It’s important to take your time here and clean everything thoroughly to prepare the surface properly for the next steps.
Once the window is clean, it’s time to use the WEICON Rust Remover Gel. Apply the gel evenly across the surface using a wide brush. For corners and hard-to-reach areas, a smaller brush works perfectly – it ensures every bit gets treated. Don’t forget to apply the gel both front and back. To prevent the product from drying out, wrap the window in cling film. Now, it’s time to be patient! The gel should be left to work for at least 24 hours to dissolve the rust properly. During this time, it penetrates deeply into corroded areas, creating the perfect foundation for the next steps.
Step 2: applying rust protection primer
Let’s continue! After 24 hours, the WEICON Rust Remover Gel will have done its job – now it’s time for another clean. Remove the cling film and place the barn window in a tub of warm water. Use a brush to scrub off any remaining gel, dissolved rust and dirt. Take your time and be thorough – the cleaner the surface, the better the final result.
Once the window is completely dry, it’s time for the next important step: applying the rust protection primer. Especially in a chicken coop, the old barn window will be exposed to the elements, so reliable protection is crucial. We recommend using WEICON Zinc Spray, which creates a protective zinc coating on the metal and effectively prevents new rust from forming. Spray it evenly over the cleaned surface, paying special attention to the edges and corners, as this is where rust tends to form most easily. After application, allow the spray to dry thoroughly so the protective layer can work its magic. This way, the window will not only look great but stay protected permanently.
Step 3: applying rust protection
Now for the finishing touches: the next step adds both extra protection and a more attractive look. After applying the primer, it’s time to apply WEICON Rust Protection 2000 PLUS in anthracite. The coating provides a smooth, elegant finish and provides long-term protection against the effects of weather. The anthracite colour complements the look of the chicken coop beautifully and gives the old barn window a modern, stylish character – turning an old piece of metal into a real eye-catcher.
Step 4: inserting the window panes
Finally, it’s time to insert the panes with WEICON Windscreen Adhesive. Start by taping off the edges of the panes to keep things tidy. This way, the glue ends up exactly where it should. A great feature of our Presspack products is the special Ergo-Connect dosing tip which makes application even easier. First, apply the windscreen adhesive to the front side. Then, carefully insert the window pane. To ensure a secure and firm fit, apply adhesive to the back too. Next, remove the adhesive tape to reveal a clean, precise edge. While doing this, gently press the pane with your other hand to ensure everything stays in place. Now the adhesive just needs 24 hours to cure – and your new showpiece is ready to shine in its original frame.
Here you can see our application live and in colour!