
You like unique pieces of furniture made of epoxy resin and wood and want to do your own epoxy resin DIY project? Then you’ve come to the right place! We’ll show you how to make your own small epoxy resin shelf with these DIY instructions. In our opinion, a great idea that is also suitable for “epoxy resin beginners”.
This is what you need
Material
- solid wood (the size you want)
- MDF boards or wood scraps etc. for building a casting mould
- bolts
- wall brackets incl. bolts and dowels
- Casting Resin PLUS 90
- Mould Release Agent Wax P 500
- WEICON Silicone A for sealing the formwork, if necessary.
Tools
- screwdriver
- hammer
- gloves
- universal spatula / processing spatula
- possibly a saw
Epoxy resin shelf – step-by-step instructions
Choosing the right wood
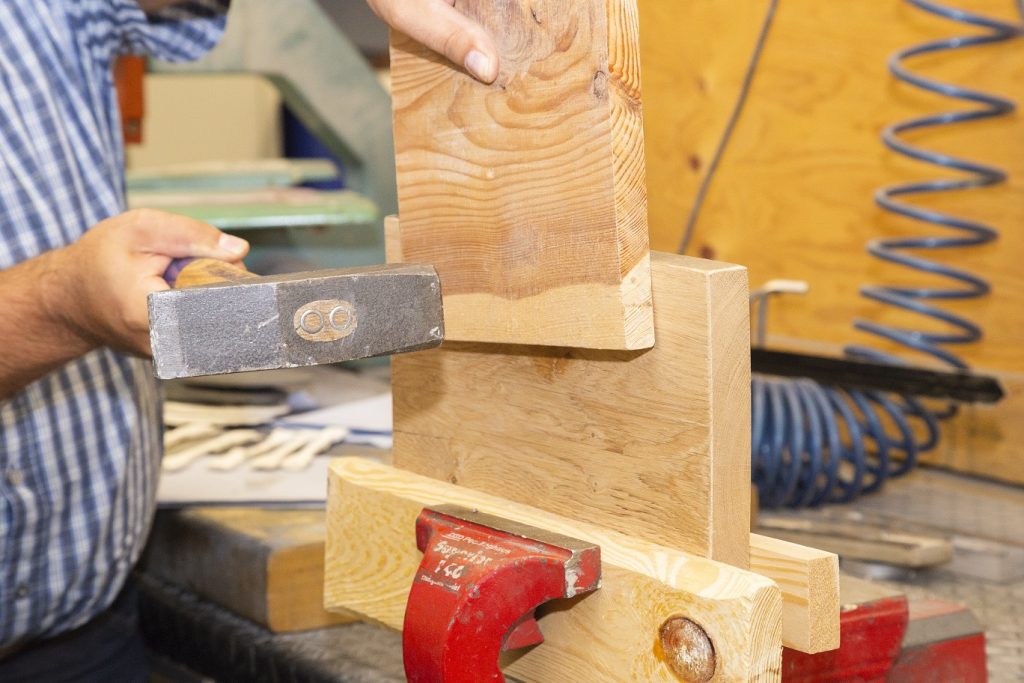
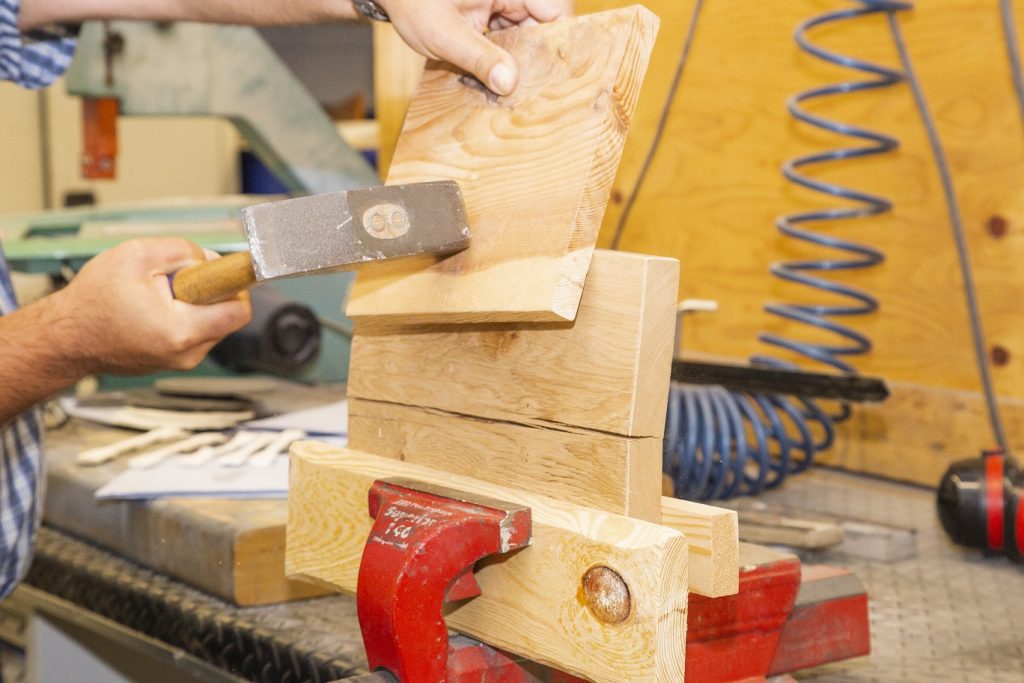
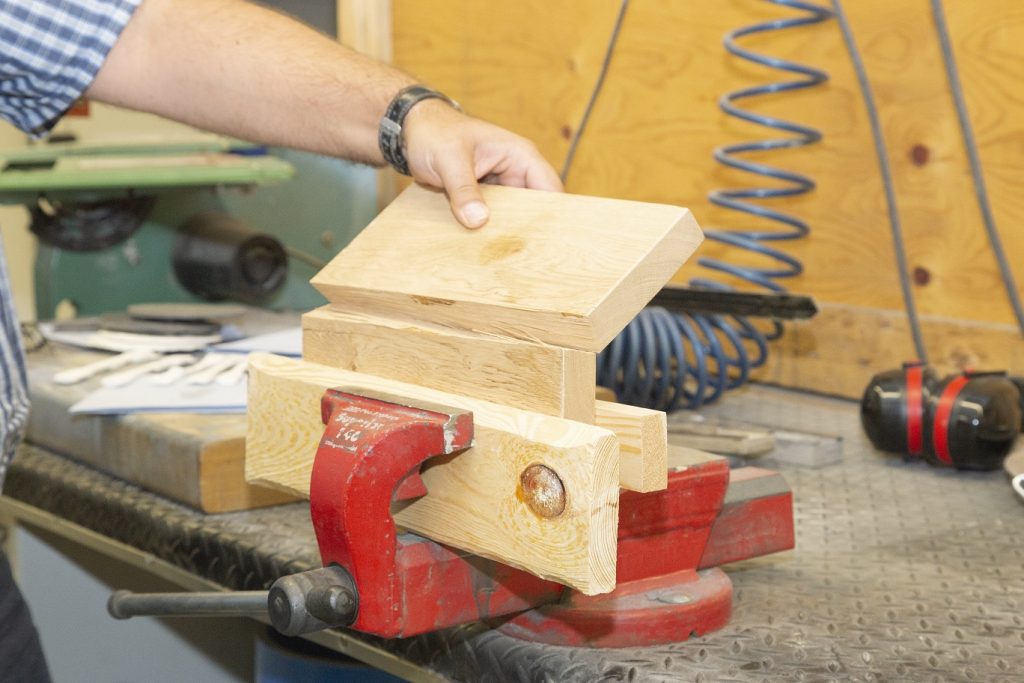
You can choose the wood for your piece of furniture according to your taste and budget. We used a small piece of scrap oak for our shelf and broke it with a powerful hammer blow in the middle along the grain. We then placed the broken pieces opposite to each other.
For larger epoxy resin DIY projects, nice boards made from a tree trunk are also suitable.
It is important that your wood is dried thoroughly before you process it. In addition, both boards should be the same length, have an identical thickness and be absolutely flat.
Preparation
If your wood still needs sanding, now is the time to do it. Remember to thoroughly remove any dust residues afterwards.
Ideally, you should have a constant temperature of 20° Celsius and a dust-free, dry and well-ventilated work area for processing the epoxy resin.
Build casting mould
To pour your epoxy resin, you will next need a casting mould in the desired size of your shelf. The casting mould consists of a bottom and side parts, which are simply screwed together. If the mould is not tight yet, you can seal it with Silicone A.
Afterwards, we coated the finished casing with our Mould Release Agent Wax P 500 so that the epoxy resin does not bond with it and our shelf board can be easily removed again.
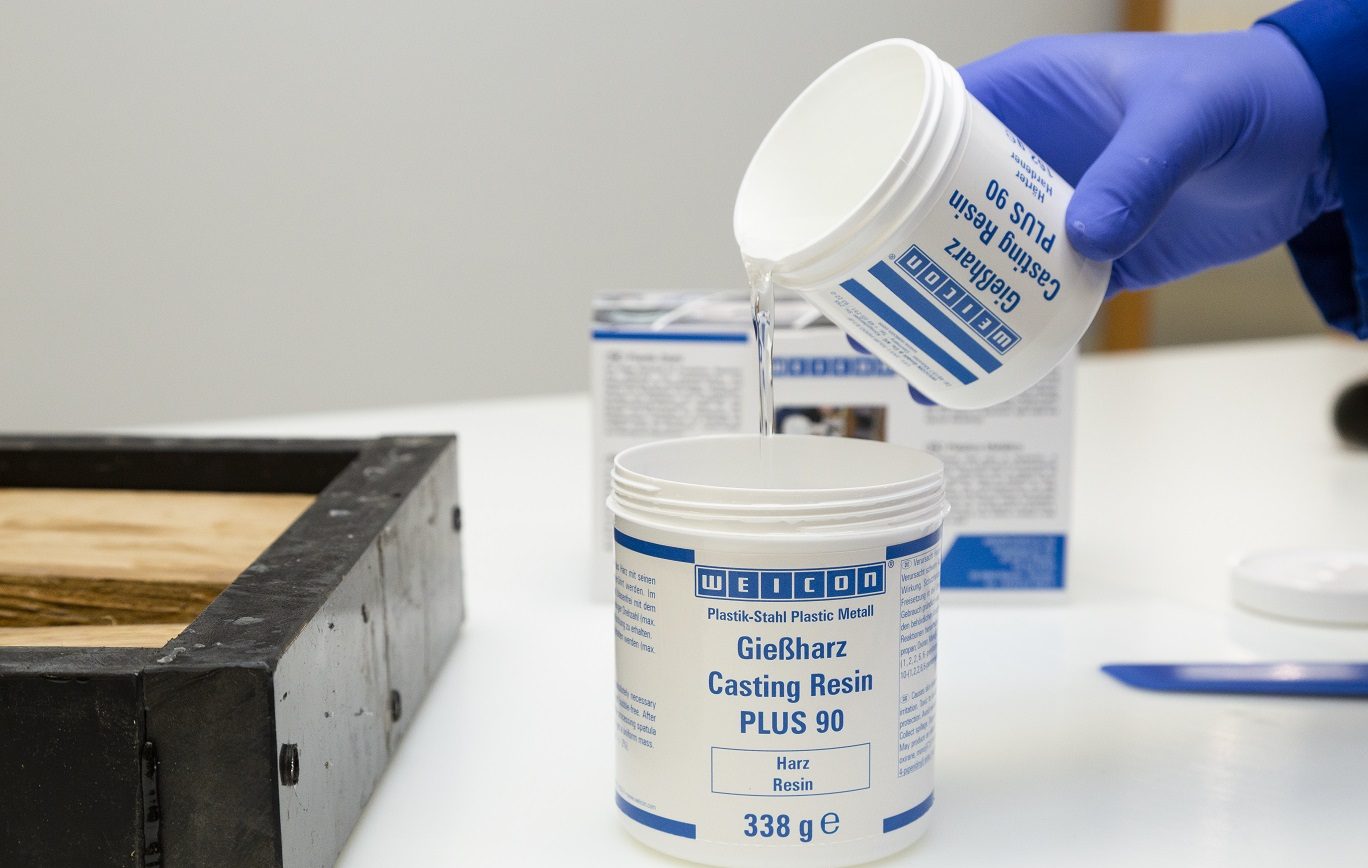
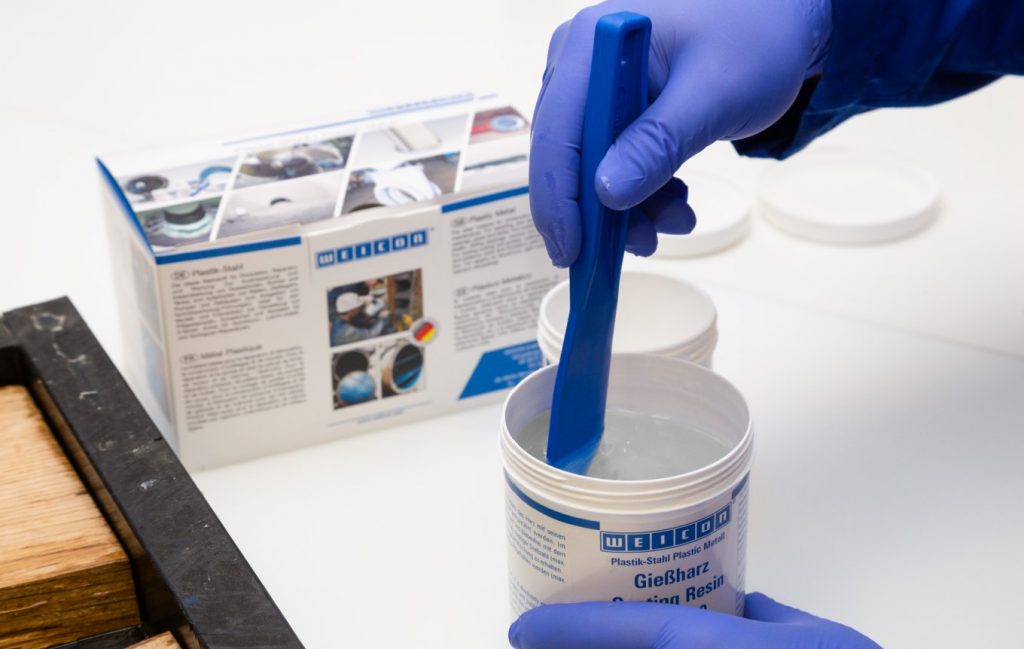
Mix epoxy resin
Now mix your Casting Resin PLUS 90 thoroughly with the hardener in the specified mixing ratio. The spatula provided is suitable for mixing. Be sure to wear gloves and, if possible, eye or face protection.
If you like, you can now mix the resin with colour pigments. We have opted for a natural look and left the resin crystal clear. Our Casting Resin PLUS 90 remains permanently crystal clear due to its particularly good UV resistance.
Application
Next step: Place the pieces of wood in the casting mould you have made. To prevent the resin from overflowing, the mould must be absolutely straight.
First, brush the wooden edges of your epoxy resin shelf with the ready-mixed resin and let it dry for at least one hour. This prevents unsightly bubbles from forming in the epoxy resin, which can be caused by outgassing of the wood.
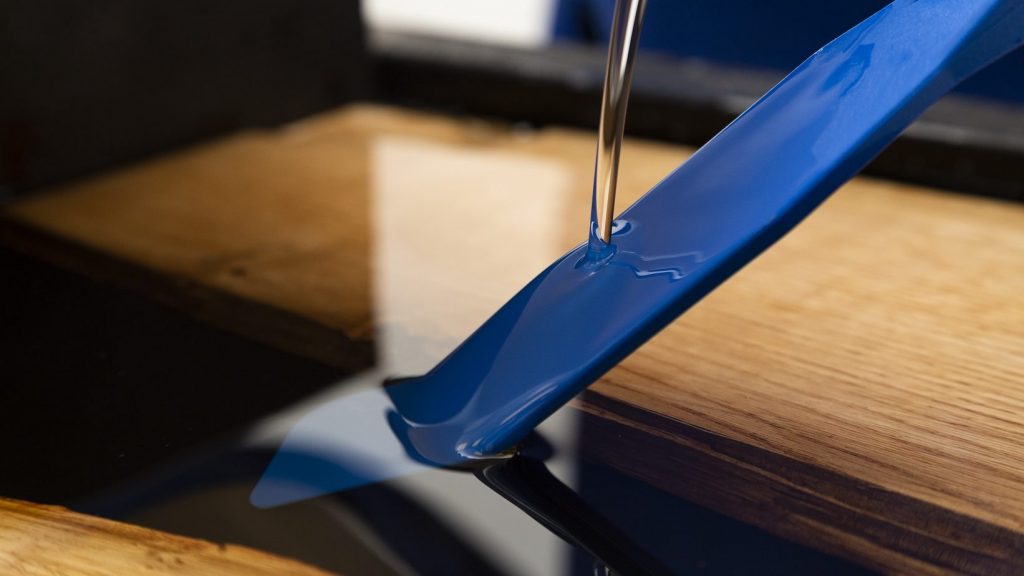
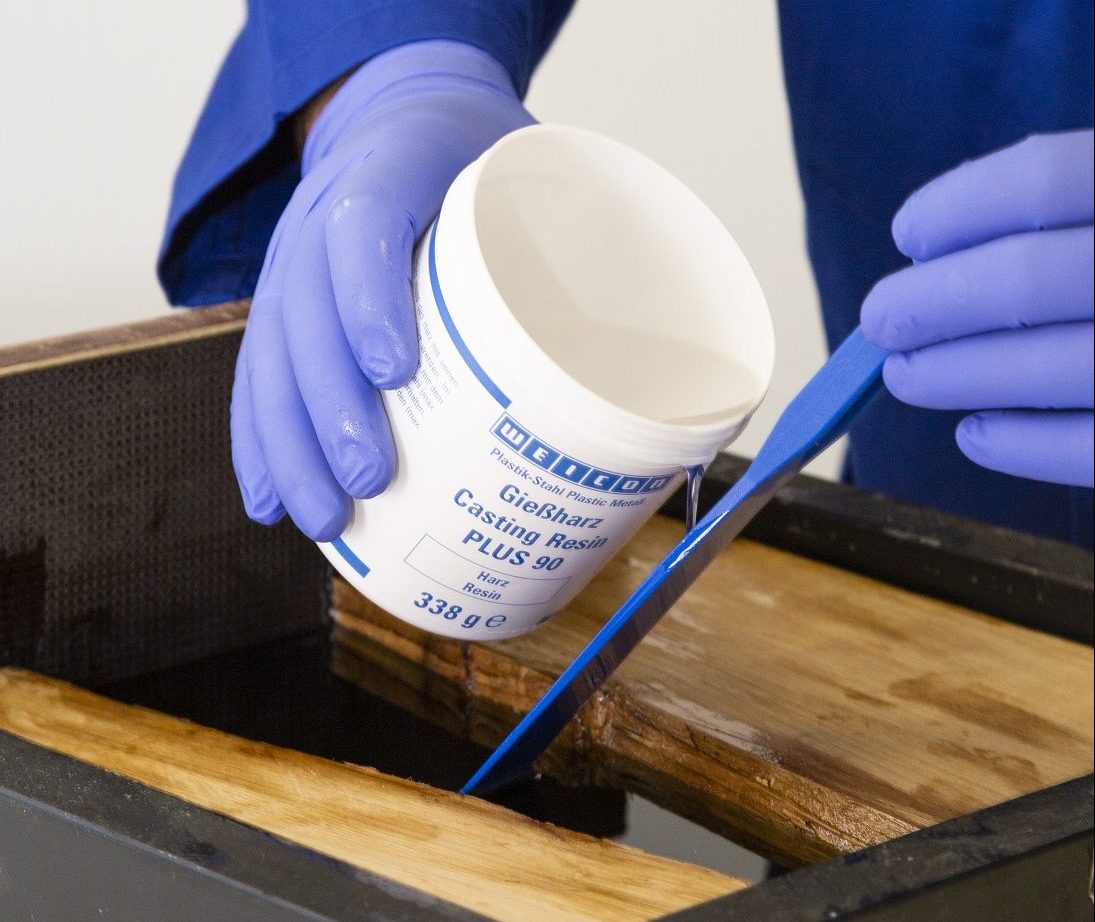
Now you can carefully pour the casting resin into the gap between the boards using the spatula provided until it is completely filled. The resin must then dry completely.
Finish
Has the casting resin hardened? Then you can remove the wood from the casting mould and sand it down from coarse to fine. For a beautiful finish, you can polish and oil the finished board afterwards.
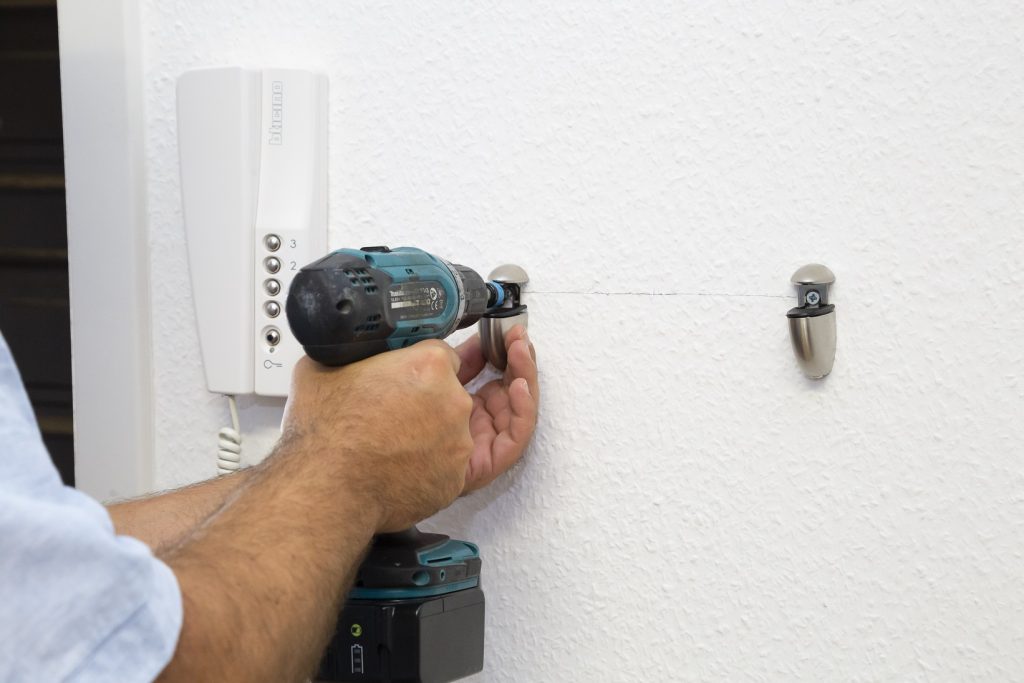
Attach the shelf board
Since we want to use our epoxy resin DIY as a shelf, we got suitable brackets for it at the DIY store and attached the board to the wall in the hallway.
The result is something to be proud of, don’t you think?

Think big
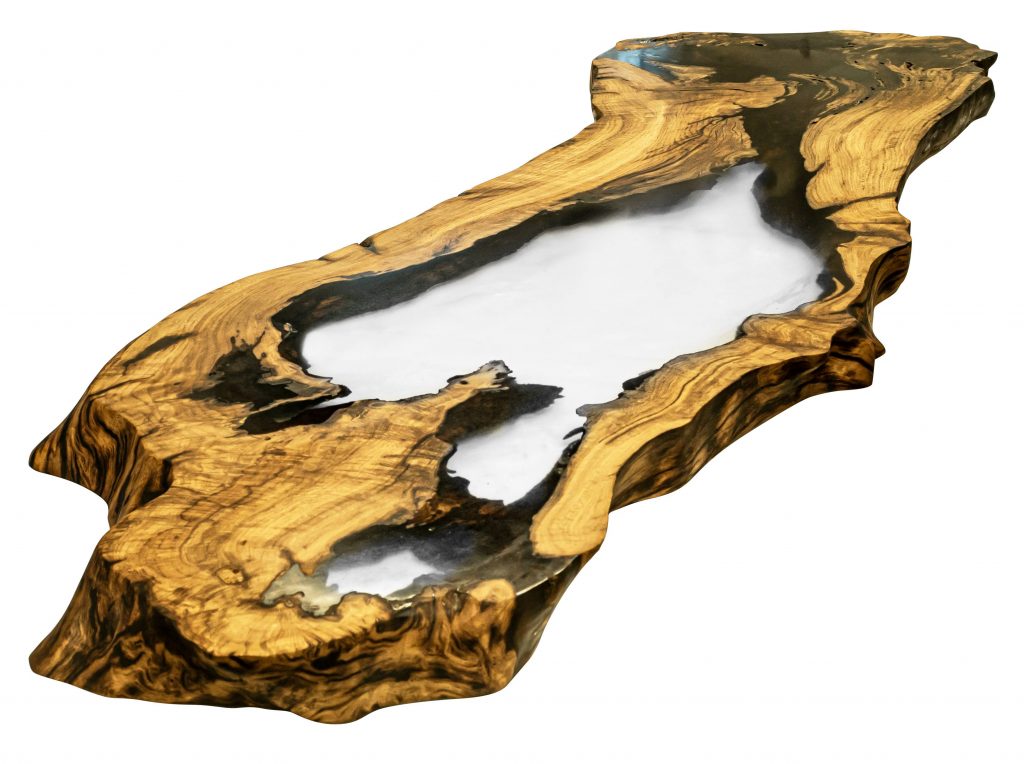
If you enjoyed this smaller project, the instructions can of course also be transferred to larger dimensions, such as for this epoxy resin table. The special formulation of our Casting Resin PLUS 90 allows high layer thicknesses of up to 90 mm.
To do this, you should first calculate the amount of casting resin required and the correct mixing ratio, and allow a significantly longer time for complete curing.
Attention wood enthusiasts
Are you annoyed by small scratches or cracks in your favourite piece of furniture? In this blog post, we’ll show you how you can easily repair cracks and joints in solid wood!
Written by Annabelle Kreft