
Advertisement, unsolicited
In this blog post, we will show you how to easily pimp your Kallax shelf and turn the low-key furniture into a true it-piece.
Kallax/Expedit – the low-key all-rounder
I don’t think I go out too far on a limb by saying that the Kallax shelf (previously Expedit) is presumably THE bestseller of the blue-yellow furniture giant. The shelf is inexpensive, matches nearly every interior design style and is super convenient for storing all kinds of bits and pieces.
Pimping a Kallax shelf
The before-and-after shot
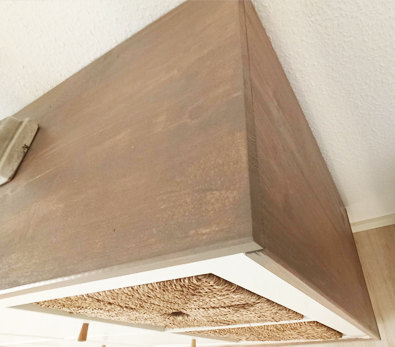
There are many ways to pimp a Kallax shelf. I now have this beautiful piece at home. As you can see in the before-and-after shot, a new wooden lining can already make all the difference.
Admittedly, the shelf (which is one of the previous Expedit-models) wasn’t in great condition to start with. The high-gloss varnish had been scratched during several relocations, but I didn’t want to get rid of it entirely. One more reason to give the old piece a good spruce up!
And as employee of an adhesive producer it goes without saying that I glued the wood panels. With the help of WEICON products, of course!

Before (left) | After (right)
Step-by-step instructions
This is what you need
- WEICON Flex 310 M® 2 K MS-Polymer with Special Mixing Nozzle
- standard cartridge gun
- WEICON Surface Cleaner
- coarse sandpaper
- plywood panels (e.g. spruce)
- wood varnish for indoor use
- furniture legs

Step 1: Sand the shelf
It’s best to first roughen the surfaces of the Kallax or Expedit shelf, that are going to be bonded, with a piece of coarse sandpaper. Especially, when you have the high-gloss version. The adhesive simply sticks better to a rough surface.

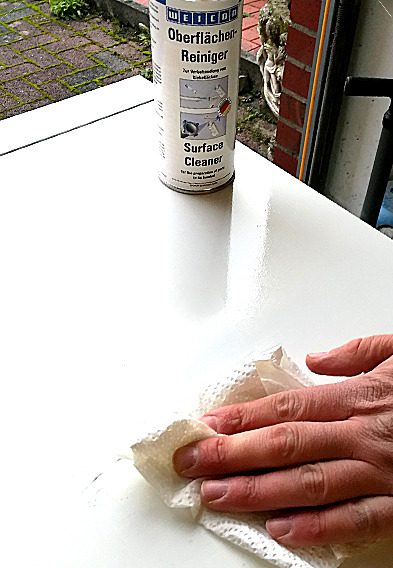
Step 2: Clean the surfaces
Dust, dirt and grease are some of the biggest enemies of adhesive bonding. That is why you should clean the surfaces of the shelf thoroughly after sanding. And who would have thought? Our WEICON Surface Cleaner is perfect for that.
You can find out more about cleaning and bonding in this blog post.
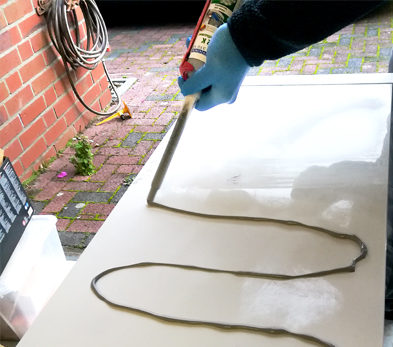
Step 3: Apply the adhesive
Now it’s time to get serious! Which means: Attach the mixing nozzle with cut-off tip (don’t be stingy with the piece you cut off), load the cartridge gun and apply the adhesive. You should, however, dismiss the 5-8 cm of the adhesive bead, as the mixing ratio of the two-component adhesive only gets ideal after the first few centimetres.
The best way of application is to dispense serpentine lines with the mixing nozzle. Why? Thanks to the serpentine application and the subsequent joining of the bonding components, the adhesive spreads evenly. Also, our WEICON Flex 310 M® 2 K MS-Polymer is very strong, so a full-surface application isn’t necessary.
Important: The adhesive cures very fast with a pot life of 5 minutes, so you should work pretty swiftly.
Step 4: Attach the sidewalls
Now, carefully place the fitted wood panels on top of the shelf surfaces that are covered with the adhesive. I always joined the opposing vertical sides at the same time and fixated them with clamps. After approximately one hour, I tilted the shelf by 90 degrees and did the other two sides the same way.
The wood panels are made of untreated spruce plywood from a hardware store. Inexpensive and paintable.

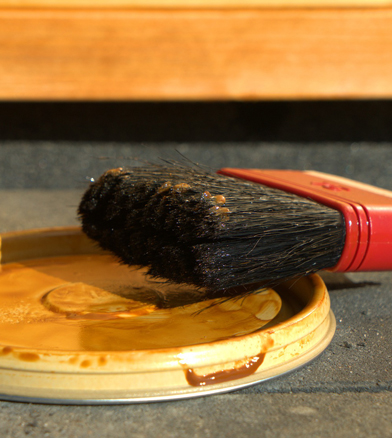
Step 5: Paint the sidewalls
After another 60 minutes, I painted the bonded wood panels with wood varnish for indoor use. I know, I know – I should have done that beforehand, then I wouldn’t have had to mask the shelf. But as the saying goes – hindsight is always easier than foresight. And you can learn from my mistake.
Step 6: The finishing touches
When you would like to pimp your Kallax shelf, you can also use furniture legs. I cut some out of a squared timber and painted them with the same wood varnish as the sidewall. Then I attached the legs to the bottom of the shelf using angle brackets.
In my opinion, the shelf is really something special now. What do you think? Feel free to leave your comments or questions below!


Furniture DIY with WEICON
Kee on more furniture DIYs? How about a stylish coffee table in industrial design? Learn more here!
Written by Annabelle Kreft